Add approvers for Self-Service actions
To open Request Configuration, click Configuration > System Settings > Request Configuration.
Default Approver
A default approver is someone in your company who can step in and approve requests pending approval if the designated approvers are not available. You would use the default approver in situations where the designated approver is away, or the position is vacant. On "everyday" requests, the default approver can be cc'd to receive notifications of all requests by clicking the box CC Default Approver.
The default approver can be anyone in the company, as long as they have the authority to view and approve requests.
Tip: Setting your MACD or Cimpl Admin user as the default approver would be considered a best practice. The default approver can "step in" and replace anyone missing in the approval chain, or, even fulfill the entire multi-step approval if required.
Update approvers for a specific action:
- Go to Configuration > System Preferences > Request Configuration.
- For Request Type, select Service Request.
- Click on Request Action entry in the Request List. The approval workflow record opens.
- Select the Approval tab.
-
Select Approval is Required.
Note: If you clear the Approval is Required checkbox for a Request Action, it will deactivate all custom workflows with that Action Type. All of the following configurations is hidden from the user.
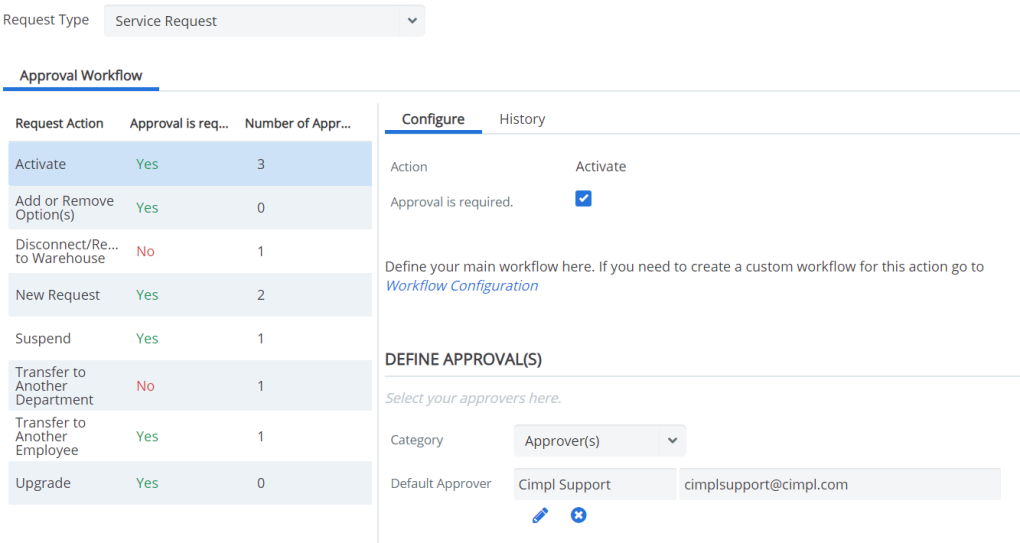
- Under Define Approvals, select Approver(s) for Category.
- Define the default approver:
Enter both the name and email of the default approver in the associated text boxes.
OR
Click + Employee to select an employee to set them as default approver. The user's name and email updates in the approver fields.
Note:
-
Click + Add Approver to add an approval level.
Note: The minimum number of approver(s) is 1. The maximum is 5.
- Select the approver definition:
- Employee Hierarchy Manager
- Employee Reporting Manager
- Organization Hierarchy Manager
- Organization Reporting Manager
- Predefined
- User Defined
-
Further define the approvers by selecting options from the subsequent drop-down menus (The options that is displayed are dependent on the approver definition selected).
Note: If the Multiple Users option is selected, you may also select approver conditions to define the employee(s) that are eligible as approver(s).
-
To send a reminder email, select to Send a reminder if the approver of the current level has no approved yet.
- Set the first reminder after X number of Days/Months/Weeks,
- Set the Repeat every Xnumber of Days/Months/Weeks until X number of occurrences or approvals.
- For Email Alert:
Select Default Approver to send a notification to the defined default approver at each approval level.
- Enter or click + Recipient for CC or BCC to add recipients to the notifications list.
Select the additional recipients who should be notified at when the AP Posting validation is fully approved.
Tip: It is best practice that the default approver be notified once the request is fully approved.
- Click Apply to save or click Cancel to exit without making changes.